Outdoor Dummy Camera with Red Blinking Light: Installation & Tips
An outdoor dummy camera with a red blinking light acts as a powerful visual deterrent for intruders……..
An outdoor dummy camera with a red blinking light acts as a powerful visual deterrent for intruders. For maximum effectiveness, strategically place and angle the camera at eye level or slightly elevated, ensuring clear visibility and subtle hiding. Choose locations with natural coverage and minimal obstruction, optimize lighting for the red light's deterrence, and point the camera towards key areas like paths and entry points. Balancing visibility, coverage, and discretion during installation ensures comprehensive security monitoring, making these Outdoor Dummy Camera Angle Tips essential for optimal results.
“Transform your outdoor space into a secure haven with an Outdoor Dummy Camera Red Blinking Light installation. This comprehensive guide unravels the secrets of this effective security solution. From understanding the blinking light’s purpose to choosing the ideal location and optimizing camera angles, we provide a step-by-step approach for seamless setup. Learn essential tips and tricks for maintaining its effectiveness, ensuring peace of mind. Elevate your outdoor security with practical insights on camera positioning and gain control over your surroundings.”
- Understanding Dummy Camera Red Blinking Light: A Quick Overview
- Choosing the Right Outdoor Location for Your Installation
- Factors to Consider When Selecting the Optimal Camera Angle
- Step-by-Step Guide: Installing the Dummy Camera with Red Blinking Light
- Tips and Tricks for Effective Use and Maintenance
Understanding Dummy Camera Red Blinking Light: A Quick Overview
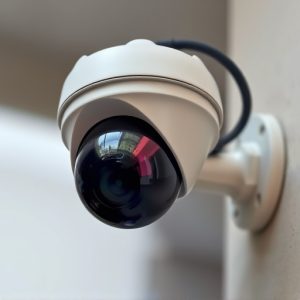
The dummy camera with a red blinking light is a popular security and surveillance tool, offering a simple yet effective way to deter potential intruders. This device mimics the appearance of a real camera, often placed in tricky angles to give the illusion of constant observation. Understanding its features is key to maximizing its benefits. The red blinking light serves as a powerful visual deterrent, indicating that the area is under surveillance and encouraging cautious behavior from passersby.
When it comes to outdoor installations, considering the dummy camera’s angle is crucial for optimal effectiveness. Positioning it in strategic locations like entryways, backyards, or near valuable assets can provide a sense of security. The right Outdoor Dummy Camera Angle Tips include mounting at eye level or slightly elevated, ensuring a clear view of the surrounding area, and hiding it subtly to avoid drawing unnecessary attention. This simple trick creates an environment where potential criminals are more likely to think twice before attempting any malicious activities.
Choosing the Right Outdoor Location for Your Installation
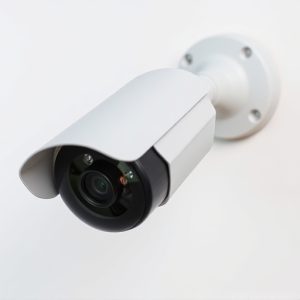
When selecting an outdoor location for your dummy camera red blinking light installation, consider a spot that offers both visibility and accessibility. Look for areas with clear lines of sight to ensure the camera captures what it’s intended to monitor effectively. Trees, buildings, or other structures can provide natural coverage but shouldn’t obstruct the view significantly. The ideal location should also be easy to reach for maintenance and adjustments.
Think about the environment as well. A secure area with minimal traffic is preferable to avoid accidental damage or tampering. Additionally, consider factors like lighting; adequate illumination ensures the camera’s red blinking light is visible from a distance, enhancing its deterrence effect. Outdoor dummy cameras are versatile, so choose an angle that best suits your needs—whether it’s pointing towards a path, driveway, or specific entry point—to provide optimal security coverage.
Factors to Consider When Selecting the Optimal Camera Angle
When selecting the best angle for an outdoor dummy camera, several factors come into play. The goal is to find a position that offers both clear visibility and optimal coverage while blending seamlessly with the surroundings to avoid detection. One key consideration is the field of view; ensuring it captures a wide enough area without overlap or blind spots is essential.
The placement should also account for natural obstructions like trees, buildings, or other physical features that might block the camera’s line of sight during different times of day and year. Additionally, outdoor conditions such as weatherproofing requirements and resistance to varying temperatures should be matched with the camera’s specifications. Considering these Outdoor Dummy Camera Angle Tips will help ensure a well-placed installation for effective surveillance.
Step-by-Step Guide: Installing the Dummy Camera with Red Blinking Light
Installing an outdoor dummy camera with a red blinking light can enhance your home security and deter potential intruders. Here’s a step-by-step guide to help you set up this device effectively:
1. Select the Ideal Location: Choose a strategic spot for your dummy camera, considering its visibility and the areas it covers. Ensure it has a clear view of entrances, windows, or any vulnerable points in your outdoor space. Think about the best angle to capture potential threats, aligning with the Outdoor Dummy Camera Angle Tips for optimal coverage.
2. Mounting the Camera: Securely attach the camera to a suitable surface using the provided hardware. This could be a wall, fence, or even a tree. Ensure the mounting surface is sturdy and level. Adjust the camera’s position until you achieve the desired field of view, making sure it captures crucial areas without overlapping or missing any critical zones.
3. Connect Power and Wiring: Plug in the power cable and route it to a nearby power source. Some models may have wireless capabilities, but for a reliable setup, ensure proper wiring. Fasten the wires securely to prevent them from getting in the way or attracting unwanted attention.
4. Set Up Motion Detection: Configure the motion sensor settings according to your preferences. Adjust sensitivity levels to avoid false triggers while ensuring it detects potential intruders effectively. Test the motion detection by triggering it manually to verify its responsiveness.
5. Configure Red Blinking Light: The red light is a powerful deterrent. Set the blinking intervals and brightness to suit your environment. A well-placed red light can startle intruders and alert you to any suspicious activity. Experiment with different settings to find the perfect balance between visibility and intimidation.
Tips and Tricks for Effective Use and Maintenance
When setting up your outdoor dummy camera, pay close attention to its angle for optimal visibility. Positioning is key; aim it towards areas that require surveillance, ensuring a clear line of sight with minimal obstructions. Experiment with different angles to find the sweet spot, especially considering the camera’s field of view. A well-placed dummy camera can deter potential intruders and provide peace of mind.
Regular maintenance is essential for keeping your outdoor dummy camera effective. This includes cleaning the lens regularly to prevent smudges or dust buildup, which could obscure its view. Check the battery life frequently, as a dead battery will render it useless. Additionally, periodically test its functionality, including the red blinking light, to ensure it’s still operational and effectively deterring unwanted visitors.
The installation of an outdoor dummy camera with a red blinking light can significantly enhance security and deter potential intruders. By strategically placing this device and adjusting the camera angle, you can gain valuable peace of mind. Remember to consider factors like lighting, visibility, and privacy when selecting the ideal location. Follow the step-by-step guide provided for a successful installation, and with regular maintenance, your dummy camera will continue to serve as an effective deterrent, offering both security and added comfort for your home or business.